Introduction to Ergonomic Keyboard PCBs
Ergonomic keyboards have gained popularity among computer users due to their ability to reduce strain and promote a more natural typing position. One of the key components of an ergonomic keyboard is the printed circuit board (PCB), which connects all the electronic components and allows for customization. In this article, we will explore the process of creating an open source ergonomic keyboard PCB project, from designing the layout to manufacturing the final product.
What is an Ergonomic Keyboard PCB?
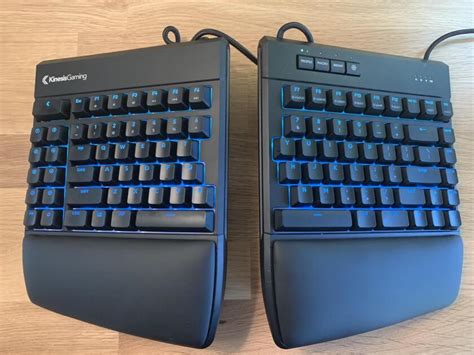
An ergonomic keyboard PCB is a specially designed circuit board that accommodates the unique layout of an ergonomic keyboard. Unlike traditional keyboard PCBs, ergonomic PCBs often feature a split design, allowing for a more natural hand and wrist position while typing. These PCBs also incorporate additional features, such as thumb clusters and programmable keys, to enhance comfort and productivity.
Benefits of Open Source Ergonomic Keyboard PCB Projects
Open source ergonomic keyboard PCB projects offer several advantages:
- Customization: Users can modify the design to suit their specific needs and preferences.
- Cost-effectiveness: By utilizing open source resources, users can save on design and development costs.
- Community support: Open source projects often have active communities that provide guidance, troubleshooting, and updates.
Designing Your Ergonomic Keyboard PCB Layout
Choosing a Layout
The first step in creating your ergonomic keyboard PCB is deciding on a layout. Some popular ergonomic keyboard layouts include:
| Layout | Description |
|---|---|
| Split | The keyboard is divided into two halves, allowing for a more natural shoulder width and wrist angle. |
| Ortholinear | Keys are arranged in a grid pattern, promoting a more efficient and ergonomic typing experience. |
| Columnar | Keys are arranged in columns, reducing finger travel distance and strain. |
Consider your typing habits and preferences when selecting a layout for your PCB.
Creating a Schematic
Once you have chosen a layout, you need to create a schematic for your PCB. A schematic is a visual representation of the electronic components and their connections. To create a schematic, follow these steps:
- Select a schematic design software, such as KiCad or Eagle.
- Add the necessary components, including switches, diodes, microcontrollers, and connectors.
- Connect the components according to your chosen layout and desired functionality.
- Double-check your connections and ensure that your schematic follows best practices for PCB design.
Designing the PCB Layout
With your schematic complete, you can now design the physical layout of your PCB. This process involves arranging the components and routing the traces that connect them. Keep these tips in mind when designing your PCB layout:
- Ensure proper spacing between components to avoid interference and facilitate soldering.
- Minimize trace lengths to reduce electrical noise and improve signal integrity.
- Use appropriate trace widths based on the current requirements of your components.
- Incorporate mounting holes and other mechanical features as needed.

Manufacturing Your Ergonomic Keyboard PCB
Selecting a PCB Manufacturer
Once your PCB layout is finalized, you need to choose a manufacturer to produce your boards. There are several factors to consider when selecting a PCB manufacturer:
- Capabilities: Ensure that the manufacturer can accommodate your PCB’s specifications, such as layer count, material, and surface finish.
- Pricing: Compare prices from multiple manufacturers to find the best value for your project.
- Turnaround time: Consider how quickly you need your PCBs and choose a manufacturer that can meet your timeline.
- Reputation: Research the manufacturer’s reputation for quality and customer support.
Preparing Files for Manufacturing
Before submitting your PCB design to a manufacturer, you need to prepare the necessary files. Most manufacturers require the following files:
- Gerber files: These files contain the information needed to manufacture your PCB, including the copper layers, solder mask, and silkscreen.
- Drill files: These files specify the location and size of the holes in your PCB.
- Bill of Materials (BOM): This document lists all the components required for your PCB assembly.
- Assembly instructions: If you are ordering assembled PCBs, provide clear instructions for component placement and orientation.
Ordering and Receiving Your PCBs
Once your files are prepared, submit them to your chosen manufacturer along with any additional requirements, such as quantity and shipping preferences. Monitor your order status and communicate with the manufacturer if any issues arise.
Upon receiving your PCBs, inspect them for quality and accuracy. Test the boards to ensure proper functionality before proceeding with the final assembly of your ergonomic keyboard.

Assembling Your Ergonomic Keyboard
Gathering Components
Before assembling your ergonomic keyboard, gather all the necessary components:
- PCB
- Switches
- Keycaps
- Stabilizers (if required)
- Microcontroller
- USB cable
- Case or enclosure
Soldering Components
Follow these steps to solder the components onto your PCB:
- Begin with the smallest components, such as diodes and resistors.
- Solder the switches, ensuring they are properly aligned and seated.
- Solder the microcontroller and any other remaining components.
- Inspect your soldering for any bridges or poor connections, and make repairs as needed.
Final Assembly
Once all the components are soldered, complete the final assembly of your ergonomic keyboard:
- Install the stabilizers (if applicable) and keycaps.
- Mount the PCB in the case or enclosure.
- Connect the USB cable to the microcontroller.

Programming Your Ergonomic Keyboard
Choosing a Firmware
To make your ergonomic keyboard functional, you need to program it with firmware. Some popular open source keyboard firmware options include:
- QMK: A highly customizable firmware with a large community and extensive documentation.
- TMK: A firmware that serves as the basis for QMK and offers a simpler codebase.
- Kaleidoscope: A firmware designed for Arduino-based keyboards, offering an intuitive programming interface.
Select a firmware that is compatible with your microcontroller and offers the features you require.
Configuring Your Firmware
Once you have chosen a firmware, configure it to suit your needs:
- Define your keyboard matrix, which maps the physical switches to their corresponding keys.
- Customize your keymap, assigning functions to each key and creating layers as needed.
- Configure any additional features, such as macros, rotary encoders, or backlighting.
Flashing Your Firmware
After configuring your firmware, flash it onto your microcontroller:
- Connect your keyboard to your computer via USB.
- Put your microcontroller into bootloader mode, following the instructions for your specific controller.
- Use the appropriate flashing tool to upload your firmware to the microcontroller.
- Test your keyboard to ensure that the firmware is functioning as expected.
Conclusion
Creating an open source ergonomic keyboard PCB project can be a rewarding and educational experience. By following the steps outlined in this article, you can design, manufacture, assemble, and program your own custom ergonomic keyboard. Remember to take advantage of open source resources and communities to streamline your process and overcome any challenges you may face along the way.
FAQ
-
Q: What skills are required to create an ergonomic keyboard PCB?
A: Creating an ergonomic keyboard PCB requires a basic understanding of electronics, PCB design, and programming. Familiarity with schematic design software, PCB layout tools, and keyboard firmware is beneficial. -
Q: Can I create an ergonomic keyboard PCB without prior experience?
A: While prior experience is helpful, it is possible to create an ergonomic keyboard PCB as a beginner. Start by learning the fundamentals of PCB design and keyboard firmware, and seek guidance from open source communities and resources. -
Q: How much does it cost to manufacture an ergonomic keyboard PCB?
A: The cost of manufacturing an ergonomic keyboard PCB varies depending on factors such as the PCB specifications, quantity, and manufacturer. Expect to pay around $20-50 for a small batch of basic PCBs, with costs increasing for more complex designs or larger quantities. -
Q: What are some common mistakes to avoid when designing an ergonomic keyboard PCB?
A: Some common mistakes include:- Failing to consider component spacing and orientation
- Neglecting to use appropriate trace widths and lengths
- Overlooking the importance of proper grounding and shielding
- Not thoroughly testing the PCB before final assembly
-
Q: Where can I find open source resources for ergonomic keyboard PCB projects?
A: There are several online communities and resources dedicated to open source keyboard projects, including:- The Keyboard PCB Guide: A comprehensive guide to designing and manufacturing keyboard PCBs
- QMK Firmware: A popular open source keyboard firmware with extensive documentation and community support
- Geekhack and Deskthority forums: Online communities where keyboard enthusiasts share knowledge and collaborate on projects
By leveraging these resources and following the steps outlined in this article, you can successfully create your own open source ergonomic keyboard PCB project.
Leave a Reply