What is the ATmega32U4 Breakout Board?
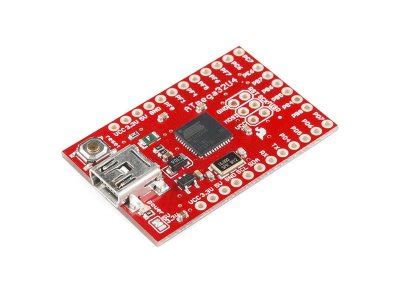
The ATmega32U4 breakout board is a compact, pre-assembled development board that features the ATmega32U4 microcontroller. This microcontroller is a member of the Atmel AVR family and is known for its rich set of peripherals, low power consumption, and USB functionality. The breakout board provides easy access to all the microcontroller’s pins, making it simple to integrate into various projects and applications.
Key Features of the ATmega32U4 Breakout Board
- ATmega32U4 microcontroller running at 16 MHz
- 32 KB flash memory, 2.5 KB SRAM, and 1 KB EEPROM
- USB 2.0 full-speed interface
- 26 digital input/output pins
- 7 PWM channels
- 12 analog input pins
- I2C, SPI, and UART interfaces
- On-board 3.3V regulator and 5V-tolerant I/O pins
- Pre-assembled and ready to use
Why Choose the ATmega32U4 Breakout Board?
There are several reasons why the ATmega32U4 breakout board is an excellent choice for your projects:
-
USB Functionality: The ATmega32U4 microcontroller has built-in USB support, allowing you to create USB-based projects without the need for additional hardware.
-
Compact Size: The breakout board’s small form factor makes it ideal for projects with limited space or for creating portable devices.
-
Extensive I/O Options: With 26 digital I/O pins, 12 analog inputs, and various communication interfaces, the ATmega32U4 breakout board can accommodate a wide range of sensors, actuators, and peripherals.
-
Pre-assembled: The breakout board comes fully assembled, saving you time and effort in setting up the microcontroller for your projects.
-
Community Support: The ATmega32U4 microcontroller is widely used in the Arduino Leonardo and Micro boards, which means there is a large community of developers and a wealth of resources available online.

ATmega32U4 Breakout Board Specifications
| Feature | Specification |
|---|---|
| Microcontroller | ATmega32U4 |
| Operating Voltage | 5V |
| Input Voltage | 7-12V |
| Digital I/O Pins | 26 |
| PWM Channels | 7 |
| Analog Input Pins | 12 |
| DC Current per I/O Pin | 40 mA |
| Flash Memory | 32 KB (4 KB used by bootloader) |
| SRAM | 2.5 KB |
| EEPROM | 1 KB |
| Clock Speed | 16 MHz |
| Dimensions | 28.6 mm x 51.3 mm |
| Weight | 9 g |

Getting Started with the ATmega32U4 Breakout Board
To start using the ATmega32U4 breakout board, you’ll need to follow these steps:
-
Set up the Arduino IDE: The Arduino Integrated Development Environment (IDE) is the most common way to program the ATmega32U4 breakout board. Download and install the latest version of the Arduino IDE from the official website (https://www.arduino.cc/en/software).
-
Install USB Drivers: Depending on your operating system, you may need to install drivers for the ATmega32U4’s USB interface. For Windows users, the necessary drivers should be automatically installed when you connect the board. For macOS and Linux users, no additional drivers are typically required.
-
Connect the Breakout Board: Use a USB cable to connect the ATmega32U4 breakout board to your computer. The board should be recognized as a USB device, and the on-board LED should light up.
-
Select the Board and Port: In the Arduino IDE, go to “Tools” > “Board” and select “Arduino Leonardo” from the list. Then, go to “Tools” > “Port” and choose the appropriate serial port for your breakout board.
-
Upload a Sketch: Open one of the example sketches provided in the Arduino IDE, or create your own. Click the “Upload” button to compile the sketch and upload it to the breakout board. If the upload is successful, the on-board LED should blink according to the sketch’s instructions.

Applications of the ATmega32U4 Breakout Board
The ATmega32U4 breakout board can be used in a wide variety of projects and applications, such as:
-
USB Human Interface Devices (HIDs): Create custom keyboards, mice, game controllers, or other USB input devices using the ATmega32U4’s native USB support.
-
Robotics and Automation: Use the breakout board to control motors, servos, and sensors in robotics projects or automated systems.
-
Internet of Things (IoT): Combine the ATmega32U4 breakout board with wireless modules like Wi-Fi or Bluetooth to create connected devices and IoT applications.
-
Audio and Music: Utilize the board’s PWM capabilities to generate audio signals or control sound-related peripherals.
-
Wearable Electronics: The breakout board’s compact size makes it suitable for integration into wearable projects, such as smart clothing or accessories.
Frequently Asked Questions (FAQ)
-
Can I use the ATmega32U4 breakout board with the Arduino IDE?
Yes, the ATmega32U4 breakout board is compatible with the Arduino IDE. Select “Arduino Leonardo” as the board type in the IDE to start programming the breakout board. -
Is the ATmega32U4 breakout board compatible with Arduino shields?
While the ATmega32U4 breakout board shares many similarities with Arduino boards, it may not be directly compatible with all Arduino shields due to differences in pin layouts and form factors. However, you can still connect various sensors, actuators, and peripherals to the breakout board using jumper wires or custom PCBs. -
What is the difference between the ATmega32U4 and other ATmega microcontrollers?
The main difference between the ATmega32U4 and other ATmega microcontrollers is the built-in USB functionality. The ATmega32U4 has native USB support, which allows it to communicate directly with a computer or other USB hosts without the need for an additional USB-to-serial converter. -
Can I power the ATmega32U4 breakout board using a battery?
Yes, you can power the breakout board using a battery. The board has an on-board 3.3V regulator and can accept input voltages between 7V and 12V. Make sure to connect the battery to the appropriate power pins on the board. -
Where can I find resources and tutorials for the ATmega32U4 breakout board?
There are numerous resources and tutorials available online for the ATmega32U4 breakout board. The Arduino community is a great place to start, as many tutorials and projects designed for the Arduino Leonardo or Micro boards can be easily adapted for the ATmega32U4 breakout board. Additionally, you can find resources on electronics forums, tutorial websites, and the official Atmel (now Microchip) documentation for the ATmega32U4 microcontroller.
Conclusion
The ATmega32U4 breakout board is a powerful and versatile development platform that offers a wide range of features and capabilities for various projects and applications. With its native USB support, extensive I/O options, and compatibility with the Arduino IDE, the breakout board is an excellent choice for hobbyists, students, and professionals alike.
By following the steps outlined in this article, you can quickly get started with the ATmega32U4 breakout board and begin exploring its potential. Whether you’re creating USB HIDs, developing robotics projects, or diving into the world of IoT, the ATmega32U4 breakout board provides a solid foundation for your electronic endeavors.
As you continue to work with the breakout board, be sure to take advantage of the vast online resources, tutorials, and community support available. With dedication and creativity, you’ll be able to unlock the full potential of the ATmega32U4 breakout board and bring your ideas to life.
Leave a Reply