Introduction to PDF-to-Gerber Conversion
Converting PDF files to Gerber and NC Drill formats is a critical process in the manufacturing of printed circuit boards (PCBs). Gerber files contain the necessary information for fabricating the copper layers, solder mask, silk screen, and drill holes of a PCB. NC Drill files specify the location, size, and type of drills needed for the board.
PDF (Portable Document Format) files are widely used for sharing and printing electronic documents. However, they are not directly usable for PCB manufacturing. The PDF file needs to be converted into the industry-standard Gerber and NC Drill formats first. This conversion process extracts the key PCB fabrication data from the PDF and generates the appropriate Gerber and drill files.
Why Convert PDF to Gerber?
There are several reasons why you may need to convert a PDF to Gerber format for PCB manufacturing:
- The PCB design was done in a EDA (electronic design automation) tool that outputs PDF files rather than Gerber
- The original Gerber files were lost and only the PDF fabrication drawing is available
- Changes or annotations were made to the PDF that now need to be incorporated into the manufacturing files
- A PDF from a customer or external designer needs to be converted to Gerber for production
Having the PCB fabrication data in industry-standard Gerber and drill format provides many benefits:
- Universal compatibility with PCB manufacturing equipment and processes
- Enabling automated pre-production checks for potential issues
- Facilitating clear communication with the fabrication partner
- Archiving the original manufacturing files for future needs
Challenges of PDF-to-Gerber Conversion
While PDF-to-Gerber conversion is a necessary step in many situations, it does present some challenges compared to using original Gerber files:
- PDF is a “flattened” format that loses information about layers and apertures
- The PDF may contain extraneous content not needed for fabrication
- Text and line strokes in the PDF need to be converted to copper features
- Identifying the drill holes and their sizes from the drawing geometry
- Confirming the accuracy of the converted files compared to the original design
Fortunately, there are software tools and services available that can handle the PDF-to-Gerber conversion process effectively. However, it’s important to review and validate the generated files to ensure nothing was lost or mistranslated from the original PDF.
PDF-to-Gerber Conversion Process
The basic process of converting a PDF to Gerber format typically involves the following steps:
-
Import: Open the PCB fabrication drawing PDF file in the conversion software.
-
Layer Mapping: Map the geometry in the PDF to the appropriate Gerber layers (e.g. top copper, bottom solder mask, drill drawing).
-
Copper Conversion: Convert the lines, polygons, and text in the PDF into Gerber copper features with the appropriate apertures.
-
Drill Recognition: Identify the drill hole locations and sizes from the relevant drawing elements (e.g. circles, pads).
-
Parameter Setting: Specify the Gerber format settings, such as units, aperture list, and file extensions.
-
Export: Generate the final Gerber and NC Drill output files for each layer.
-
Verification: Review the converted files in a Gerber viewer to check for any errors or discrepancies.
The specific steps and options available will vary depending on the software tool being used. Some tools provide automated wizards that can detect layers and drills with minimal user input, while others rely on manual mapping of the PDF objects.
Layer Mapping Considerations
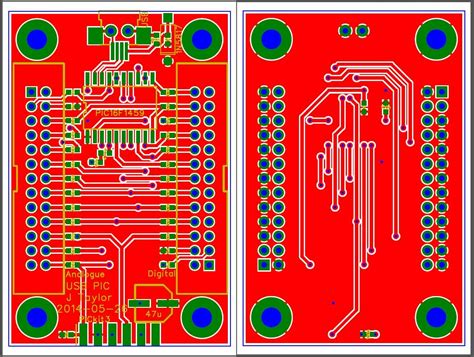
One of the key aspects of PDF-to-Gerber conversion is mapping the PDF content to the appropriate PCB layers. A fabrication drawing will typically include information for multiple layers, often using different colors or line styles to distinguish them.
Here are some common layer types found in PCB fabrication drawings:
| Layer Type | Description |
|---|---|
| Top Copper | The copper traces and pads on the top side of the board |
| Bottom Copper | The copper pattern on the bottom side of the board |
| Top Soldermask | The protective coating over the top copper, with openings for pads |
| Bottom Soldermask | The solder mask layer for the bottom side of the board |
| Top Silkscreen | The text and symbols printed on the top surface of the board |
| Bottom Silkscreen | The silk screen legends on the bottom side of the board |
| Drill Drawing | The locations and sizes of holes to be drilled in the board |
| Board Outline | The overall shape and dimensions of the PCB |
The conversion software needs to be able to recognize and map each relevant element in the PDF to one of these layer types. This may be done automatically based on the colors or attributes of the PDF objects, or it may require manual assignment by the user.
Some PDF drawings may have additional mechanical layers, notes, or dimensions that are not needed for Gerber fabrication. These elements should be ignored during the conversion process. It’s also important to handle any discrepancies or ambiguities in the PDF, such as overlapping objects or unclear line styles.
Copper Feature Creation
Once the PDF elements have been mapped to PCB layers, they need to be converted into actual Gerber features that represent the copper traces, pads, and polygons. This involves several considerations:
-
Line Strokes: Determine the appropriate aperture shape and size to use for lines and curves in the PDF, taking into account any line width or style information.
-
Solid Shapes: Convert solid polygons and filled areas in the PDF into Gerber copper pours, using the correct aperture type and polarity.
-
Pads and Vias: Identify pad and via locations from the PDF and generate Gerber flashes with the appropriate aperture sizes.
-
Text: Convert any text elements in the PDF into Gerber features, either by using a stroke font or creating the letter shapes with copper polygons.
-
Aperture List: Build a list of all the unique aperture shapes and sizes needed to represent the copper features, and include this in the Gerber file.
The specific apertures and Gerber commands used will depend on the target Gerber format (e.g. RS-274X, RS-274D) and the complexity of the design. The conversion software needs to handle different line endings, pad shapes, and text fonts correctly to avoid any misinterpretation by the PCB fabrication process.
Identifying Drill Holes
In addition to converting the copper layers, the PDF-to-Gerber process also needs to generate the associated NC Drill files that specify the locations and sizes of holes to be drilled in the board. This involves recognizing the drill holes in the fabrication drawing and extracting their properties.
Drill holes are typically represented in PDF drawings in one of two ways:
-
Drill Symbols: The drawing may use specific symbols, such as small circles or crosshairs, to indicate the location of drills. The drill size is usually noted next to the symbol or in a drill table.
-
Plated Holes: Drills may also be shown as the plated holes in the copper pads for through-hole components or vias. In this case, the hole size is determined by the inner diameter of the pad.
The conversion software must be able to identify these drill indicators and generate the corresponding NC Drill commands. This includes specifying the drill position, diameter, and any special properties like plating or slot shape.
Some PCB designs may have multiple drill sizes or types, so the software needs to group together similar holes and optimize the drilling process. The resulting NC Drill files should be compatible with standard formats like Excellon or Sieb & Meyer.
Output File Generation
The final step in the PDF-to-Gerber conversion process is generating the output files in the appropriate formats for PCB fabrication. This typically involves several files:
-
Gerber Files: A separate Gerber file is created for each mapped PCB layer, such as top copper, bottom solder mask, etc. These files use the standard Gerber format (RS-274X or RS-274D) and include the aperture definitions and flash/draw commands.
-
Drill Files: The NC Drill data is exported as one or more drill files, usually in Excellon format. Multiple files may be used to represent different drill types, such as plated and non-plated holes.
-
Aperture List: A separate aperture list file (e.g. RS-274X) may be generated to define the shapes and sizes of the apertures used in the Gerber files. Alternatively, the aperture definitions may be embedded in each Gerber file.
-
Fabrication Notes: Any additional fabrication notes or instructions from the original PDF may be exported as a separate text file or included as comments in the Gerber files.
The exact file naming and organization will depend on the requirements of the PCB manufacturer. Some fabs prefer to receive a single ZIP archive containing all the Gerber and drill files, while others expect a specific directory structure or naming convention.
It’s important to review the generated files in a Gerber viewer to verify that all the layers and features have been converted correctly. Any discrepancies or errors should be fixed before sending the files for manufacturing.

Verifying the Converted Files
After converting the PDF to Gerber and NC Drill files, it’s essential to verify that the output matches the original design intent. Even with automated conversion tools, there is always a risk of errors or misinterpretations that could lead to manufacturing issues.
Here are some key aspects to check when verifying the converted files:
-
Layer Mapping: Confirm that all the necessary PCB layers have been extracted from the PDF and mapped to the correct Gerber files. Check that no important layers are missing or duplicated.
-
Copper Features: Visually compare the copper features in the Gerber files to the original PDF drawing. Verify that traces, pads, and polygons have the expected shapes, sizes, and locations. Watch for any unintended gaps or overlaps.
-
Drill Holes: Review the NC Drill files to ensure that all the required holes are present and positioned correctly. Check that the hole sizes match the original design and that no extra or missing holes have been generated.
-
Apertures: Examine the aperture list or embedded aperture definitions to confirm that the correct shapes and sizes are being used for each feature type. Verify that there are no missing or duplicate apertures.
-
Text and Legends: Check that any text or legend elements from the PDF have been converted accurately into the silk screen layers. Verify that the text is readable and properly oriented.
-
Board Outline: Confirm that the overall board shape and dimensions match the original design. Check for any unintended notches, cutouts, or contour errors.
-
Fabrication Notes: Review any additional fabrication notes or instructions to ensure they have been carried over from the PDF correctly.
Comparing the converted files to the original PDF can be done visually using a Gerber viewer that supports layer overlays or side-by-side viewing. Some CAD tools also provide DFM (Design for Manufacturing) checks that can analyze the Gerber and drill files for common manufacturing issues.
If any errors or discrepancies are found during the verification process, they should be corrected before releasing the files for production. This may involve adjusting the conversion settings, manually editing the Gerber or drill files, or even updating the original PDF drawing.

FAQ
Q: What is the difference between Gerber and NC Drill files?
A: Gerber files contain the 2D image data for each layer of the PCB, such as copper traces, solder mask openings, and silk screen legends. NC Drill files specify the locations, sizes, and types of holes to be drilled in the board, including plated and non-plated holes. Both file types are essential for PCB fabrication, but they serve different purposes.
Q: Can I convert any PDF to Gerber format?
A: While most PCB fabrication drawing PDFs can be converted to Gerber, there are some limitations. The PDF should contain vector graphics that clearly represent the copper and drill layers. Raster images, low-resolution PDFs, or incomplete drawings may not convert properly. The conversion software may also have trouble with non-standard PDF elements or fonts.
Q: What is the best software for converting PDF to Gerber?
A: There are several popular software options for PDF-to-Gerber conversion, including:
- Ucamco PCB Visualizer
- CAM350 from DownStream Technologies
- ViewMate from Pentalogix
- FilmMaker from Numerical Innovations
The best choice will depend on your specific needs, budget, and workflow. Some PCB design tools also include built-in PDF import functionality.
Q: How long does it take to convert a PDF to Gerber?
A: The conversion time will depend on the complexity of the design, the quality of the PDF, and the software being used. Simple designs with clear layer separation may take only a few minutes to convert. More complex designs with multiple drill sizes or intricate copper features may take longer. The user’s familiarity with the conversion software can also impact the overall process time.
Q: What should I do if the converted Gerber files have errors?
A: If you notice any errors or discrepancies in the converted Gerber files, you should first double-check the conversion settings and layer mapping to ensure nothing was missed. If the errors persist, you may need to manually edit the Gerber or drill files using a text editor or specialized Gerber editing software. In some cases, it may be necessary to go back and update the original PDF drawing to resolve any ambiguities or inconsistencies.

Conclusion
Converting PCB fabrication drawings from PDF to Gerber and NC Drill formats is a critical step in the manufacturing process. By extracting the essential layer and drill information from the PDF, we can create industry-standard files that can be used directly by PCB fabrication equipment.
While PDF-to-Gerber conversion presents some challenges, such as handling flattened data and recognizing drill holes, there are many software tools available to streamline the process. The key is to carefully map the PDF elements to the appropriate layers, convert the features accurately, and verify the resulting files against the original design.
By understanding the PDF-to-Gerber workflow and best practices, PCB designers and manufacturers can ensure that their designs are faithfully translated into physical boards, even when the original Gerber files are not available. This helps to reduce errors, improve communication, and ultimately get products to market faster.
Leave a Reply