Introduction to PCBs and 3D Printer Printing Heads
A printed circuit board, or PCB, is used to mechanically support and electrically connect electronic components using conductive pathways, tracks or signal traces etched from copper sheets laminated onto a non-conductive substrate. PCBs are widely used in electronics to hold chips and other components in place.
In 3D printers, the printing head is the assembly that deposits the plastic filament or other material to create the printed object layer by layer. The printing head typically consists of:
- Extruder motor to push the filament
- Hot end to melt the plastic
- Nozzle to deposit the melted plastic precisely
- Fans and heatsinks for cooling
- Sensors to monitor temperature
- Wiring to connect the electrical components
The PCB provides the electrical connections between these components and allows them to be controlled by the printer’s main controller board. A well-designed printing head PCB enables reliable extrusion, precise temperature control, and smooth movement for high-quality 3D prints.
Overview of the Fabtotum 3D Printer and Printing Head
The Fabtotum is a hybrid 3D printer, scanner, and milling machine designed for personal fabrication. Some key features include:
- Interchangeable printing head system supporting different materials
- 200mm x 200mm x 200mm build volume
- Heated glass print bed
- 50 micron layer resolution
- Onboard Linux computer with WiFi and touchscreen control
The wired printing head for Fabtotum uses high quality components for optimal performance. The hot end can reach temperatures up to 300°C, allowing printing with high-temperature filaments like ABS, PLA, PET, and Nylon.
The extruder uses a geared design for increased torque and can handle flexible filaments. An inductive proximity sensor enables automatic bed leveling for consistent first layers. The entire assembly is designed for easy installation and swapping thanks to plug-and-play electrical connectors.

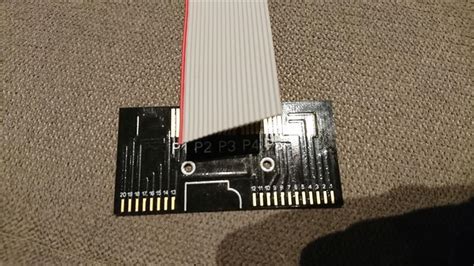
Printing Head PCB Features and Specifications
The PCB in the Fabtotum wired printing head connects and controls the following key components:
| Component | Specifications |
|---|---|
| Hot End | E3D V6 compatible, max temp 300°C, thermistor sensor |
| Extruder | Geared extruder with 1:3 ratio, 1.75mm filament, proximity sensor |
| Heater Cartridge | 12V 30W ceramic cartridge |
| Fan | 12V DC axial fan for heat sink |
| Fan | 12V blower fan for print cooling |
| Thermistor | 100K ohm NTC 3950 thermistor |
The PCB itself has the following features:
- 2 layer board with 1oz copper thickness
- 22 x 100mm board size
- Integrated connectors for easy installation
- Support for 12-24V input voltage
- Onboard 5V and 3.3V regulation
- Overcurrent and reverse polarity protection
- Pluggable screw terminals for power and fans
- Dedicated MOSFETs for heater and fans with flyback diodes
- I2C EEPROM for storing head identification and calibration data
- Micro JST connectors for thermistors and proximity sensor

Circuit Design and Schematic
The schematic for the Fabtotum printing head PCB was designed in KiCad, an open source electronics CAD software. The key sections include:
Power Supply
12-24V DC power is supplied via screw terminals and goes through a 2A PTC fuse and reverse protection diode. The input voltage is filtered and split to two linear regulators:
- 5V 1A regulator for powering fans and logic
- 3.3V 300mA regulator for powering the I2C EEPROM and proximity sensor
Hot End Temperature Control
The 12V 30W heater cartridge is switched via an IRLZ44N MOSFET with a 10K pulldown resistor on the gate. The 100K thermistor is connected to a NTC circuit using a 4.7K ohm reference resistor and outputs an analog voltage to the controller. A 1N4148 flyback diode is used across the heater terminals to protect against inductive spiking.
Extruder and Fans
The extruder motor, heatsink fan, and blower fan are all controlled via IRL540N MOSFETs with 10K pulldowns and flyback diodes. The motor uses a separate connector while the fans are connected via screw terminals. The proximity sensor for filament detection operates at 5V and interfaces over a 3-pin micro JST connector.
I2C EEPROM
A 24C32 32Kb I2C EEPROM is included to store printing head identification, calibration data, and other parameters. It operates at 3.3V and uses 4.7K pullups on the I2C lines. The I2C address pins are pulled low to set an address of 0x50.

PCB Layout and Routing
The PCB layout was created in KiCad and optimized for manufacturability and ease of assembly. The key considerations include:
- Placing connectors and terminals near edges for accessibility
- Providing adequate copper fill and thermal relief for high current paths
- Minimizing high current loop areas to reduce EMI
- Separating analog and digital grounds and using a star ground topology
- Avoiding acute angles and unterminated traces
- Providing mounting holes compatible with the head assembly
The board is routed with 8mil traces and 8mil spacing, with 20mil power traces. Ground pours are used on both sides with stitching vias. The final layout files are exported in Gerber RS-274X format for manufacturing.
Bill of Materials (BOM) and Assembly
The complete bill of materials for the printing head PCB includes:
| Designator | Qty | Description | Manufacturer | Part Number |
|---|---|---|---|---|
| C1-C5 | 5 | 10uF 25V ceramic capacitor 0805 | Murata | GRM21BR71E106KA73L |
| D1, D3-D5 | 4 | 1N4148 75V 300mA diode SOD-123 | On Semiconductor | 1N4148WT |
| D2 | 1 | 1N5819 40V 1A Schottky diode SOD-123 | On Semiconductor | 1N5819HW-7 |
| F1 | 1 | 2A 6V PTC resettable fuse 1812 | Bel Fuse | 0ZCJ0020AF2E |
| J1-J3 | 3 | 3-pin 2.54mm straight header | Sullins | PRPC040SAAN-RC |
| J4, J5 | 2 | 2-pin 3.5mm screw terminal | On Shore | OSTVN02A150 |
| J6-J8 | 3 | 2-pin micro JST PH connector | JST | B2B-PH-K-S |
| Q1-Q4 | 4 | IRL540N 100V 36A N-channel MOSFET TO-220 | Infineon | IRL540NPBF |
| R1-R4, R6, R7 | 6 | 10K ohm 1% 1/8W resistor 0805 | Yageo | RC0805FR-0710KL |
| R5, R8 | 2 | 4.7K ohm 1% 1/8W resistor 0805 | Yageo | RC0805FR-074K7L |
| U1 | 1 | L7805 5V 1A linear regulator TO-220 | STMicroelectronics | L7805CV |
| U2 | 1 | LD1117V33 3.3V 800mA linear regulator SOT-223 | STMicroelectronics | LD1117V33C |
| U3 | 1 | 24C32 32Kb I2C EEPROM SOIC-8 | Atmel | 24C32A-I/SN |
The PCB is assembled by first soldering the surface mount components using solder paste and a reflow oven, then soldering the through-hole components. The assembled board is inspected and cleaned prior to installation in the printing head assembly.
Firmware and Software
The Fabtotum printing head PCB interfaces with the printer’s main controller board using the following connections:
- 12-24V power supplied via the screw terminals
- PWM control signals for the heater (PWM capable pin)
- PWM control signals for the fans and extruder motor (PWM capable pins)
- Analog signal from the thermistor voltage divider (analog input)
- I2C lines for the proximity sensor (digital I/O)
- I2C lines for the EEPROM (digital I/O)
The printer firmware reads the data stored in the EEPROM to identify the printing head and load the appropriate control parameters such as PID settings, fan speeds, and calibration offsets. The thermistor readings are used for PID feedback control of the hot end temperature, while the proximity sensor is used for filament detection and flow control.
The host software communicates with the firmware to set temperatures, extrusion amounts, and fan speeds based on the G-code commands in the print file. The firmware then outputs the corresponding PWM signals to control the MOSFET switches on the PCB.
Testing and Quality Control
Each printing head PCB undergoes the following testing and quality control procedures:
- Visual inspection for proper component placement and soldering
- Continuity testing for power and ground connections
- Resistance measurements for heater and thermistors
- Functional testing of fans, extruder motor, and proximity sensor
- Burn-in testing for at least 24 hours with temperature cycling
- Final inspection and packaging
Boards that pass all tests are labeled with QC stickers and packaged with the appropriate cables and connectors for installation.
Installation and Usage
To install the printing head PCB in the Fabtotum:
- Make sure the printer is powered off and unplugged
- Remove the old printing head assembly and disconnect the wiring harness
- Connect the new wiring harness to the main controller board following the wiring diagram
- Screw the PCB onto the back of the printing head assembly using the provided M3 screws
- Connect the fans, extruder motor, heater cartridge, thermistor, and proximity sensor to the corresponding terminals on the PCB
- Verify all connections are secure and route the wiring harness to avoid snagging or rubbing
- Power on the printer and verify the new head is detected and thermal controls are working
- Perform a test print and check that extrusion, cooling, and bed leveling are functional
The new printing head can be used with a variety of materials within its temperature limits. Be sure to update the slicer settings for the nozzle diameter and any calibration offsets specific to the head.
Troubleshooting and Maintenance
If you encounter issues with the printing head PCB, follow these troubleshooting steps:
- Check that all wiring and connections are secure and not damaged
- Verify the input voltage is within spec and the regulators are outputting 5V and 3.3V
- Check the resistance of the heater cartridge and thermistor are within range
- Ensure the firmware is configured properly for the type of printing head installed
- Inspect the nozzle and heater block for clogs or leaks and clean or replace as needed
To maintain optimal performance, periodically:
- Clean the nozzle exterior with a brass brush to remove built-up plastic
- Check the fans for excessive noise or vibration and replace if worn out
- Lubricate the extruder gears with high-temperature grease
- Recalibrate the bed level offsets after every few prints
- Update the firmware to the latest version for bug fixes and improvements
With proper installation and maintenance, the Fabtotum printing head PCB should provide reliable performance and produce high-quality prints for its rated lifetime.
Frequently Asked Questions (FAQ)
1. What voltage does the printing head PCB require?
The PCB is designed to work with an input voltage range of 12-24V DC. Most commonly, it is used with 12V power supplies in 3D printers.
2. Is the PCB compatible with other hot ends besides the E3D V6?
While it is designed for the E3D V6, the PCB should be compatible with other hot ends that use a cartridge heater and thermistor with the same specifications. However, the mounting holes and connectors may need to be adapted.
3. Can I use this PCB in a different 3D printer besides the Fabtotum?
In theory, yes, as long as the printer’s main controller board provides the necessary control signals and power supply. However, you would need to modify the firmware to support the specific features of this PCB such as the EEPROM and proximity sensor.
4. What type of thermistor does the PCB use?
The PCB is designed for a 100K ohm NTC thermistor with a 3950 beta coefficient. This is the most common type used in 3D printer hot ends. Using a different type of thermistor may require changing the circuit and firmware.
5. How do I upgrade the firmware on the printing head PCB?
The PCB itself does not contain any firmware. The firmware is located on the main controller board of the printer and can be upgraded by following the manufacturer’s instructions, typically by flashing a new firmware binary over USB or SD card. Be sure to select a firmware version that supports the features of this specific printing head board.
Conclusion
The Fabtotum wired printing head PCB is a critical component that enables reliable and high-performance 3D printing. By properly designing the circuit, selecting quality components, and optimizing the layout, we have created a PCB that meets the demanding requirements of personal fabrication.
From providing stable power regulation to precise thermal control and sensor interfacing, this PCB integrates all the necessary functions in a compact and easy-to-use package. With features like plug-and-play connectivity, EEPROM identification, and proximity sensing, it simplifies the process of installing and swapping printing heads.
Whether you are a hobbyist, educator, or professional user, the Fabtotum printing head PCB offers a robust and versatile solution for your 3D printing needs. By following the installation, usage, and maintenance guidelines outlined in this article, you can ensure optimal performance and longevity of your printing head.
As the 3D printing industry continues to evolve, we will strive to develop even more advanced and user-friendly printing head PCBs that push the boundaries of what is possible with personal fabrication technology. Stay tuned for future updates and happy printing!
Leave a Reply