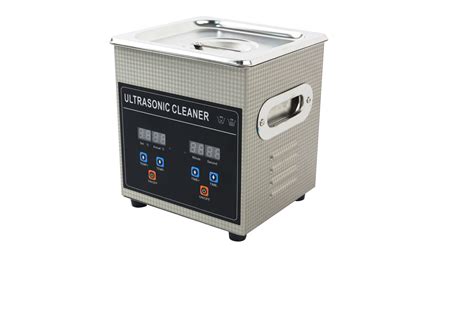
Introduction to Ultrasonic Cleaners
An ultrasonic cleaner is a powerful tool that uses high-frequency sound waves to clean and restore various objects, including electronics and printed circuit boards (PCBs). The cleaning process involves submerging the item in a cleaning solution and subjecting it to ultrasonic vibrations, which create microscopic bubbles that implode and release energy, effectively removing dirt, grime, and other contaminants from the surface.
Benefits of Using an Ultrasonic Cleaner for Electronics and PCBs
- Deep cleaning: Ultrasonic cleaners can reach into tiny crevices and hard-to-reach areas, ensuring a thorough cleaning of intricate electronic components and PCBs.
- Non-destructive: Unlike harsh chemicals or abrasive cleaning methods, ultrasonic cleaning is gentle and non-destructive, making it suitable for delicate electronics.
- Time-saving: Ultrasonic cleaners can clean multiple items simultaneously, saving time and effort compared to manual cleaning methods.
- Environmentally friendly: Many ultrasonic cleaning solutions are biodegradable and eco-friendly, reducing the environmental impact of the cleaning process.
Choosing the Right Ultrasonic Cleaner
When selecting an ultrasonic cleaner for restoring electronics and PCBs, consider the following factors:
Size and Capacity
Choose an ultrasonic cleaner with a tank size that accommodates the largest items you plan to clean. Consider the dimensions of your electronics and PCBs to ensure they fit comfortably in the tank.
Frequency and Power
Ultrasonic cleaners typically operate at frequencies between 20 kHz and 400 kHz. Higher frequencies are more suitable for delicate items, while lower frequencies are better for heavy-duty cleaning. Look for a cleaner with adjustable power settings to optimize the cleaning process for different types of electronics.
Heating Function
Some ultrasonic cleaners come with a built-in heating function, which can enhance the cleaning performance by increasing the temperature of the cleaning solution. This is particularly useful for removing stubborn contaminants and accelerating the cleaning process.
Accessories and Features
Consider additional features and accessories that can improve your cleaning experience, such as:
- Drainage system for easy tank emptying
- Timer and automatic shut-off for precise cleaning durations
- Removable basket for easy loading and unloading of items
- Adjustable ultrasonic power and frequency settings
- Digital display for monitoring temperature and cleaning time

Preparing Your Electronics and PCBs for Ultrasonic Cleaning
Before placing your electronics and PCBs in the ultrasonic cleaner, follow these preparation steps:
- Disassemble the electronic device, if possible, to access individual components and PCBs.
- Remove any batteries, as they can be damaged by the cleaning process.
- Protect sensitive components, such as speakers and microphones, by covering them with waterproof tape or removing them altogether.
- Pre-clean heavily soiled items with a soft brush or compressed air to remove loose dirt and debris.

Choosing the Right Cleaning Solution
The cleaning solution plays a crucial role in the effectiveness of ultrasonic cleaning. When selecting a cleaning solution for electronics and PCBs, consider the following:
Compatibility
Ensure that the cleaning solution is compatible with the materials of your electronics and PCBs. Some solutions may be too harsh or corrosive for certain components, causing damage or discoloration.
Concentration
Follow the manufacturer’s instructions for mixing the cleaning solution with water. Using the correct concentration is essential for optimal cleaning performance and to avoid damaging your items.
Safety
Choose a cleaning solution that is non-toxic, biodegradable, and safe for use with electronics. Avoid solutions containing harsh chemicals or abrasive particles that can harm your items or pose health risks.
Here are some common types of cleaning solutions suitable for electronics and PCBs:
| Solution Type | Description |
|---|---|
| Aqueous | Water-based solutions, often with added detergents or surfactants |
| Solvent | Organic solvents, such as isopropyl alcohol or acetone |
| Enzymatic | Solutions containing enzymes that break down specific contaminants |
| Alkaline | Solutions with a high pH, effective for removing grease and oils |

Step-by-Step Guide to Ultrasonic Cleaning
- Fill the ultrasonic cleaner tank with the prepared cleaning solution, ensuring that the liquid level covers the items to be cleaned.
- Place the electronics and PCBs in the tank, either directly or using a basket or tray to keep them separated.
- Set the desired cleaning time and temperature (if applicable) according to the manufacturer’s recommendations and the type of items being cleaned.
- Turn on the ultrasonic cleaner and allow it to run for the set duration.
- Once the cleaning cycle is complete, remove the items from the tank using tongs or gloves to avoid contaminating them with skin oils.
- Rinse the cleaned items with clean water, either by submerging them in a separate container or using a spray bottle.
- Dry the electronics and PCBs thoroughly using compressed air, a lint-free cloth, or by allowing them to air-dry in a clean environment.
Post-Cleaning Inspection and Reassembly
After cleaning your electronics and PCBs, inspect them for any signs of damage or remaining contaminants. If necessary, repeat the cleaning process or use a soft brush to remove stubborn debris.
Once you are satisfied with the cleanliness of your items, reassemble the electronic device, taking care to reconnect any removed components and double-checking for proper functionality.
Maintenance and Care of Your Ultrasonic Cleaner
To ensure the longevity and optimal performance of your ultrasonic cleaner, follow these maintenance tips:
- Clean the tank regularly with a soft cloth and mild detergent to remove any built-up residue.
- Change the cleaning solution according to the manufacturer’s recommendations or when it becomes visibly contaminated.
- Store the ultrasonic cleaner in a clean, dry place when not in use.
- Regularly inspect the cleaner for any signs of wear or damage, and replace any faulty components as needed.
FAQ
-
Can I use tap water in my ultrasonic cleaner?
While tap water can be used, it is recommended to use distilled or deionized water to prevent mineral buildup in the tank and to ensure optimal cleaning performance. -
How long should I run the ultrasonic cleaner for electronics and PCBs?
The cleaning time depends on the level of contamination and the type of items being cleaned. As a general guideline, start with a 5-10 minute cleaning cycle and adjust as needed based on the results. -
Can I use my ultrasonic cleaner to clean other items besides electronics?
Yes, ultrasonic cleaners are versatile and can be used to clean a wide range of items, including jewelry, dental instruments, automotive parts, and more. However, ensure that the item is compatible with the cleaning solution and can withstand the ultrasonic vibrations. -
How often should I change the cleaning solution in my ultrasonic cleaner?
Change the cleaning solution when it becomes visibly contaminated or according to the manufacturer’s recommendations. Typically, this is after 20-30 cleaning cycles or when the solution appears dirty or discolored. -
Can ultrasonic cleaning damage my electronics or PCBs?
When used correctly, ultrasonic cleaning is a safe and effective method for restoring electronics and PCBs. However, improper use, such as using incompatible cleaning solutions or exposing items to excessive ultrasonic power, can cause damage. Always follow the manufacturer’s guidelines and exercise caution when cleaning delicate components.
Conclusion
Ultrasonic cleaners are a powerful and efficient tool for restoring electronics and PCBs to their original condition. By understanding the principles behind ultrasonic cleaning, choosing the right cleaner and cleaning solution, and following the proper cleaning procedures, you can effectively remove dirt, grime, and other contaminants from your electronic devices. Regular maintenance and care of your ultrasonic cleaner will ensure that it continues to provide excellent cleaning results for years to come.
Leave a Reply