Types of Mounting Holes
There are several types of mounting holes that can be incorporated into a PCB design, each with its own characteristics and applications. Here are some of the most common types:
Through Holes
Through holes are the most basic type of mounting hole. They are drilled completely through the PCB and allow for the insertion of screws, bolts, or other fasteners from either side of the board. Through holes are typically plated with a conductive material to prevent the exposed copper from oxidizing and to provide a better electrical connection if necessary.
Blind Holes
Blind holes, also known as buried holes, are drilled partially through the PCB from one side and do not extend through the entire board thickness. These holes are often used when space is limited on one side of the board or when a cleaner appearance is desired on the opposite side. Blind holes can be more challenging to manufacture and may require special drilling techniques.
Counterbored Holes
Counterbored holes are similar to through holes but have a larger diameter recess on one side of the board to accommodate the head of a screw or bolt. This allows for a flush or recessed mounting surface on one side of the PCB. Counterbored holes are often used in applications where a low profile or smooth surface is required.
Countersunk Holes
Countersunk holes are another variation of through holes, featuring a conical recess on one side of the board to accommodate flat head screws. This results in a flush mounting surface similar to counterbored holes but with a more gradual transition. Countersunk holes are commonly used in applications where a seamless or aerodynamic surface is desired.
Mounting Hole Sizes
The size of the mounting holes on a PCB depends on several factors, including the size of the fasteners being used, the thickness of the board, and the amount of mechanical stress the board will be subjected to. Here are some common mounting hole sizes and their typical applications:
| Hole Diameter | Fastener Size | Typical Application |
|---|---|---|
| 2.2 mm | M2 | Small, lightweight PCBs |
| 3.2 mm | M3 | Medium-sized PCBs, moderate loads |
| 4.2 mm | M4 | Larger PCBs, heavy loads |
| 5.2 mm | M5 | Very large PCBs, extreme loads |
It’s essential to choose the appropriate mounting hole size based on the specific requirements of your application. Using holes that are too small can result in inadequate fastening strength, while using holes that are too large can waste board space and increase manufacturing costs.

Mounting Hole Placement
The placement of mounting holes on a PCB is critical to ensure proper mechanical stability and to avoid interference with other board components. Here are some guidelines to follow when placing mounting holes:
-
Corner Placement: Mounting holes are typically placed in the corners of the board, as this provides the most stable support and helps prevent the board from flexing or twisting.
-
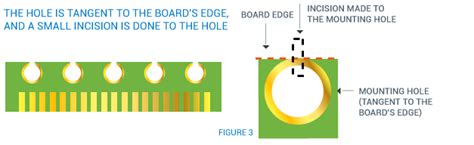
Edge Clearance: Ensure that there is sufficient clearance between the mounting holes and the edges of the board. A minimum distance of 2-3 times the hole diameter is recommended to prevent the board from cracking or breaking during installation or use.
-
Component Clearance: Avoid placing mounting holes too close to other board components, such as connectors, switches, or tall components. Maintain a minimum clearance of at least 2-3 mm between the holes and any nearby components.
-
Symmetry: When possible, place mounting holes symmetrically on the board to ensure even distribution of mechanical stress and to facilitate easier installation in the enclosure.
-
Hole Spacing: If multiple mounting holes are required, ensure that they are spaced evenly and consistently. A common spacing for mounting holes is 2.54 mm (0.1 inches), which aligns with standard grid sizes used in PCB design software.

Best Practices for Mounting Hole Design
To ensure optimal performance and reliability of your PCB, consider the following best practices when designing mounting holes:
-
Plated vs. Non-Plated Holes: Decide whether your mounting holes need to be plated or non-plated. Plated holes provide better electrical connectivity and prevent oxidation, while non-plated holes are suitable for pure mechanical connections.
-
Hole Tolerances: Specify appropriate tolerances for your mounting holes based on the manufacturing capabilities of your PCB fabricator. Tighter tolerances may increase manufacturing costs but ensure a better fit with your fasteners.
-
Pad Size: If using plated holes, ensure that the surrounding pad size is large enough to accommodate the hole tolerances and provide sufficient annular ring for reliable soldering.
-
Solder Mask: Apply solder mask around the mounting holes to prevent solder from wicking into the holes during assembly, which can make it difficult to insert fasteners.
-
Mechanical Reinforcement: In applications with high mechanical stress, consider adding additional reinforcement around the mounting holes, such as thicker copper or additional layers of PCB material.
-
Fastener Selection: Choose appropriate fasteners for your mounting holes based on the size, material, and application requirements. Consider factors such as corrosion resistance, insulation, and compatibility with the PCB material.

FAQ
- What is the recommended minimum distance between mounting holes and board edges?
-
The recommended minimum distance between mounting holes and board edges is 2-3 times the hole diameter. This helps prevent the board from cracking or breaking during installation or use.
-
Can I use non-plated mounting holes in my PCB design?
-
Yes, non-plated mounting holes can be used in PCB designs where pure mechanical connections are required. Plated holes are preferred when electrical connectivity or oxidation prevention is necessary.
-
How do I determine the appropriate mounting hole size for my application?
-
The appropriate mounting hole size depends on factors such as the size of the fasteners being used, the thickness of the board, and the amount of mechanical stress the board will be subjected to. Refer to the table in the “Mounting Hole Sizes” section for common hole diameters and their typical applications.
-
What is the purpose of applying solder mask around mounting holes?
-
Applying solder mask around mounting holes helps prevent solder from wicking into the holes during assembly, which can make it difficult to insert fasteners. It also provides a cleaner appearance and can help prevent short circuits.
-
How can I reinforce mounting holes in high-stress applications?
- In applications with high mechanical stress, you can reinforce mounting holes by adding thicker copper or additional layers of PCB material around the holes. This helps distribute the stress more evenly and prevents the board from cracking or failing prematurely.
Conclusion
Defining board edge mounting holes is a critical aspect of PCB design that ensures proper mechanical stability and ease of installation. By understanding the different types of mounting holes, selecting appropriate sizes, and following best practices for placement and design, you can create reliable and robust PCBs that meet the specific requirements of your application.
Remember to consider factors such as hole tolerances, pad sizes, solder mask application, and mechanical reinforcement when designing your mounting holes. Additionally, always consult with your PCB manufacturer to ensure that your design is compatible with their fabrication capabilities and guidelines.
By carefully planning and executing your mounting hole design, you can create PCBs that are not only functionally sound but also mechanically stable and easy to integrate into your final product.
Leave a Reply